Electronというフレームワークを使うとデスクトップアプリケーションを簡単に作ることができます。
Electronとは、Javascriptを土台としており、主にReact.jsを使って開発を進めることができます。
Electronで環境構築をする時、やや詰まりましたので、再現性のある手順を共有したいと思います。
node.jsのインストールが終わっているものとし、デスクトップ上に"electron1"などと適当な名前のフォルダを作成してください。
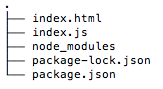
最終的なフォルダ構成は下のようになります。
STEP1:必要なモジュールをインストールする
node.jsでモジュールをインストールする時は、npmコマンドを使います。
npm install electron@1.6.1 --save-dev
npm install connors/photon --save
npm install react@15.4.2 react-dom@15.4.2 react-router@3.0.0 --save
npm install babel-cli@6.18.0 babel-preset-es2015@6.18.0 babel-preset-react@6.16.0 --save-dev
まず1行目でelectronのモジュールをインストールしています。electron@xxxと記述することで、パッケージをしていすることができます。
2行目ではPhotonKitというElectron向けに開発されたCSSフレームワークをインストールしています。
3行目はReact.js関連のモジュールになります。
4行目でインストールしているのはbabelといい、JavaScriptの次世代の機能を振るいブラウザでも使えるようにするコンパイラになります。
現時点でフォルダ構成は以下のようになっています。
STEP2:index.jsとindex.htmlを作成する
次にindex.jsとindex.htmlを作成していきます。
//index.js

const electron = require('electron');
// Module to control application life.
const {app} = electron;
// Module to create native browser window.
const {BrowserWindow} = electron;

// Keep a global reference of the window object, if you don't, the window will
// be closed automatically when the JavaScript object is garbage collected.
let win;

function createWindow() {
  // Create the browser window.
  win = new BrowserWindow({width: 800, height: 600});

  // and load the index.html of the app.
  win.loadURL(`file://${__dirname}/index.html`);

  // Open the DevTools.
  win.webContents.openDevTools();

  // Emitted when the window is closed.
  win.on('closed', () => {
    // Dereference the window object, usually you would store windows
    // in an array if your app supports multi windows, this is the time
    // when you should delete the corresponding element.
    win = null;
  });
}

// This method will be called when Electron has finished
// initialization and is ready to create browser windows.
// Some APIs can only be used after this event occurs.
app.on('ready', createWindow);

// Quit when all windows are closed.
app.on('window-all-closed', () => {
  // On OS X it is common for applications and their menu bar
  // to stay active until the user quits explicitly with Cmd + Q
  if (process.platform !== 'darwin') {
    app.quit();
  }
});

app.on('activate', () => {
  // On OS X it's common to re-create a window in the app when the
  // dock icon is clicked and there are no other windows open.
  if (win === null) {
    createWindow();
  }
});
次にindex.htmlを作成します。
//index.html

<!DOCTYPE html>
<html>
  <head>
    <meta charset="UTF-8">
    <title>Hello World!</title>
  </head>
  <body>
    <h1>ようこそ、Electronアプリへ!</h1>
    We are using node <script>document.write(process.versions.node)</script>,
    Chrome <script>document.write(process.versions.chrome)</script>,
    and Electron <script>document.write(process.versions.electron)</script>.
  </body>
</html>
STEP3:package.jsonを作成する
以下のコマンドでpackage.jsonを作成することができます。
npm init色々聞かれますが、デフォルトの設定で大丈夫です。
大事なのは、package.jsonの中で"main"の設定です。先ほどindex.jsを作成しましたので、ここの箇所がindex.jsになっていることを確認してください。
package.jsonの例として以下のようになっていればOKです。
"name"などは任意の名前で構いません。
//package.json

{
  "name": "electron1",
  "version": "1.0.0",
  "description": "sample app",
  "main": "index.js",
  "dependencies": {
    "babel-cli": "^6.18.0",
    "babel-preset-es2015": "^6.18.0",
    "babel-preset-react": "^6.16.0",
    "electron": "^1.6.1",
    "photon": "^0.1.2",
    "react-router": "^3.0.0",
    "react-dom": "^15.4.2",
    "react": "^15.4.2"
  },
  "devDependencies": {},
  "scripts": {
    "test": "echo \"Error: no test specified\" && exit 1"
  },
  "author": "",
  "license": "ISC"
}
STEP4:electronを起動する
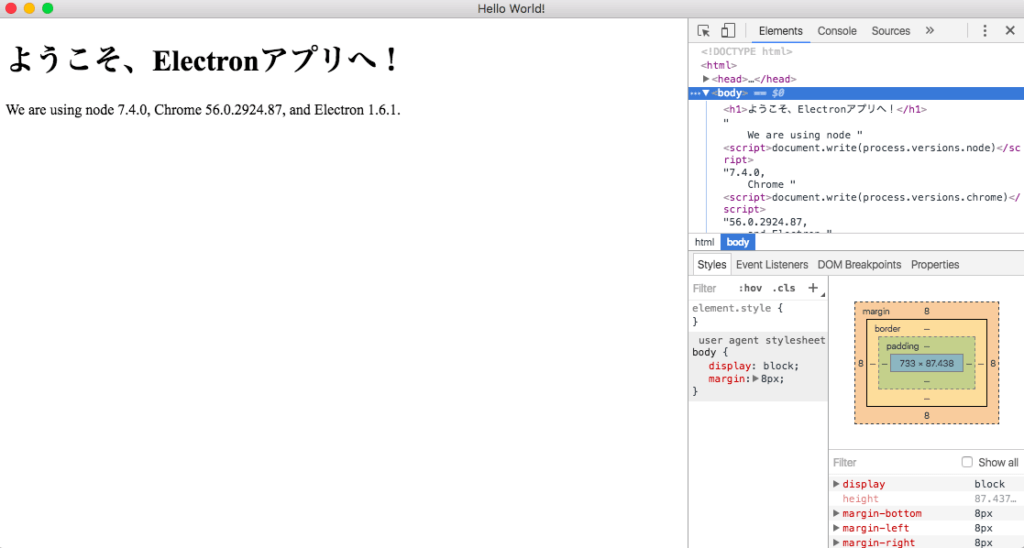
いよいよElectronアプリの起動です!
以下のコマンドで起動してみてください。
./node_modules/.bin/electron .最後のドットは、カレントディレクトリで実行しますよ、という意味です。
以下のように表示されれば成功です。